|
CyberShredder v1.10 Copyright ⌐2002-2005 CyLog Software |
| Introduction | |||
| How To | |||
| Registration | |||
| License Agreement | |||
How to use CyberShredder
 CyberShredder is a very simple application with an uncomplicated user interface. Using the menu you can
setup the application to your liking. Below is a simple explanation of the menu commands and the methods
the application is using to delete files.
Shortcuts to CyberShredder - How to delete files
Using the file menu you can place shortcuts to CyberShredder on the desktop, send to menu and you Windows
2K/XP taskbar.
A Desktop shortcut can be used to drag a file or folder directly to it. This will launch the application
and immediately delete the dropped files.
A Send To shortcut can be used to delete files, by right-clicking on them on a common Windows Explorer
window and selecting "Send To/CyberShredder" from the menu that appears. Again, this will launch CyberShredder
and delete the selected file(s).
Finally, the Taskbar shortcut is a convenient way to launch CyberShredder without accessing the Windows Start/Programs
menu
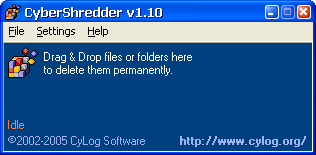
While the application is running and the "Idle" status is displayed in the bottom-left hand corner of the application window, you can drag & drop any file(s) or folder(s) from a Windows Explorer window.
Always on Top
By selecting this option from the Settings menu, you set the CyberShredder window to be always on top of other
application windows even if it is not the currently focused application. This makes dropping files easier.
Confirm File Deletion
By selecting this option from the Settings menu, CyberShredder will ask for your confirmation before deleting
any file. It is recommended that you have this option always checked, especially when you use CyberShredder for
the first time.
Please note that when CyberShredder encounters a Read-Only, Hidden or System file will always ask for your permission to delete it. Answering 'No' will ignore that file, 'Yes' will reset the particular attribute (R/O, Hidden or System) and attempt to delete it and finally 'Yes to all' will attempt to reset that attribute and delete the rest of the files. If you run a new set of deletions, CyberShredder will ask you again before erasing Read-Only, Hidden or System files.
Auto-Exit when invoked with Parameters
Check this option from the Settings menu, if you want the application to exit automatically after shredding files
when invoked through the Send To menu or when dragging and dropping files onto a CyberShredder shortcut.
 File Shredding Methods
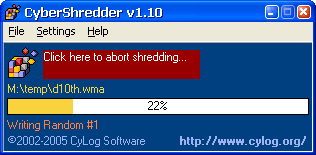
CyberShredder supports three methods of file shredding. It writes over the contents of the file and past that into the slack area of
the hard disk that a file occupies. This makes sure that it will overwrite all hard disk clusters that the file was written to.
After writing over the current file contents several times, the program truncates the file (so the previous size of the file becomes unknown), then it changes the file's filename to an unreadable one, resets the file's modification, creation and last access date/time and finally removes the file. There is absolutely no way for a recovery utility to find the file by using (or guessing) its name, size or date/time information. The table below lists the methods CyberShredder supports and highlights the main differences between them.
| Very Quick Shred | One-pass writes zeros over the file. Very low security, but quick enough for deleting not very important information. |
| Quick Shred | A three-pass secure and quick way to delete files. Writes zeros (0), ones (1) and then a random stream of bytes. |
| Normal Shred | The NSA approved method of file erasure, uses seven-pass file overwriting. |
Warning!
Please note that CyberShredder uses low-level Windows API routines, which override the normal way
the operating system writes to the disk (cached writes), to make sure that every file write operation
goes directly to the hard disk. This removes files in the most secure fashion and
renders file recovery impossible.